


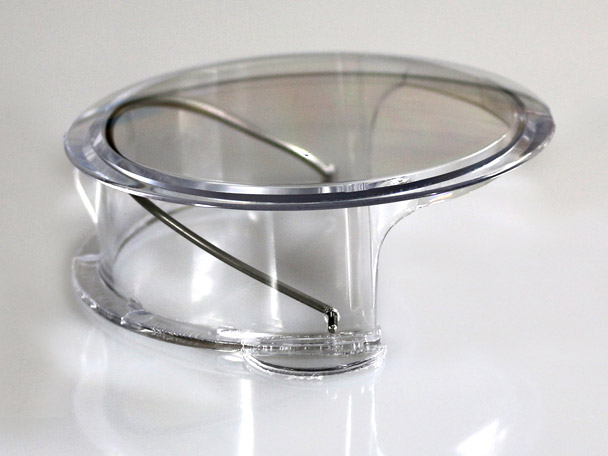
The CC3251F Snapvent is not a revision, it is a custom hand altered part. It takes 18 separate steps by hand to produce this part. It incorporates additional tabs on the left and right that are chemically acid welded to the outside edges to give it greater holding strength for faster vehicles. In addition, it also uses a custom hand made wire that is a larger diameter and stiffer to create more tension against the installation hole. This is the strongest part we can manufacture using the base of our standard ventilator. It is generally not required for most installations.
Installation:
- First determine exactly where you wish to have your ventilators placed in your vehicle and mark the locations accordingly.
- Next, it is of paramount importance, that you first drill a test hole in a different piece of material that matches where your ventilators will be installed. Check your hole diameter as it must be exactly 3 1/4″ for the ventilator to function properly. The diameter of the hole is what secures the ventilator in position. If your hole is too large the ventilator will “loosely rotate” in the hole and not function correctly. It is better for the hole to be slightly smaller than required, than it is for it to be larger.
- Once you are satisfied with your test, drill or cut your holes in the places you have previously marked.
- Take your ventilator, and with the bottom open part facing away from you, squeeze the sides, and push the ventilator fully into the hole you cut. Don’t worry, you cannot squeeze hard enough by hand to damage the part.
- Push the ventilator firmly in place all the way into the opening until the top part is flush with the window surface. This is the fully closed position.
From inside the vehicle you may now “open” the ventilator by pressing on the leading edge slightly and this will cause the scoop to open. You may also handle the sides and rotate the part where the scoop is either facing forwards to scoop air, or facing rearwards to exhaust air.
Suggested cutting methods:
It is preferable that the temperature be at least 70 degrees Fahrenheit when making the installation in any type of acrylic. Acrylic’s become brittle as the temperatures decline. Never try to cut a hole in a cold piece of acrylic.
The hole can be made with a 3 ¼” metal cutting hole saw having 6 teeth per inch, or finer. Use at a slow speed of 300 – 400 RPM. Cut half of the way through from one side, then cut the rest of the way through from the other side. Use a file, abrasive paper, or a scraper to remove the sharp edges from the hole. This is NOT a FAA-PMA approved part.
The above guidelines are only suggestions, and each installation is different. It is up to the installer to make the appropriate judgements on their particular application and act accordingly. Snapvent Plastics is not responsible for incorrectly drilled or placed holes, or for the suitability of our product to your application.